Are you trying to update to iOS 18 but your iPhone is stuck on the “Preparing Update” screen? If you find this article, you must have this problem now. Here you will learn 6 easy solutions if your iPhone got stuck on the Preparing Update screen, and you can’t update to iOS 18 anyhow.
Questions about iPhone Preparing Update
First thing first. It’s imperative to know what happens behind the scene when you attempt to update your iPhone to iOS 18. The questions below will help you understand the process.
1. Why does it say ‘Preparing Update’ on iPhone?
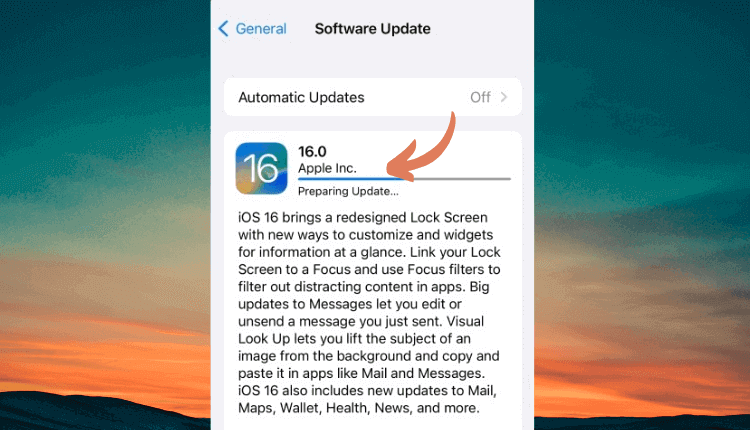
When you tap ‘Download and Install’ on the ‘Software Update’ screen, your iPhone connects to the Apple server and downloads the most recent version of iOS compatible with your phone. After downloading, it extracts the files so they can be installed on your device accordingly. During this process, your iPhone displays the ‘Preparing Update’ message on the screen.
2. How long should my iPhone say Preparing Update?
Depending on the model of your iPhone and the version of iOS you are updating to, the ‘Preparing Update’ message may take anywhere between twenty to thirty minutes. If the message stays on the screen for a significantly long time, probably there’s an issue, and this is where the next section comes into play.

How to Fix iPhone Stuck on Preparing Update
Now that you know what processes take place in the background when iPhone says Preparing Update, below are some proven fixes to help you eliminate the issue if your iPhone is stuck on Preparing Update during the update to iOS 18.
Solution 1: Force Restart Your iPhone
Force restarting your phone pulls all the current from the device’s circuit momentarily and then puts it back on. This flushes all the junk information from the iPhone’s memory, thus allowing it to start clean. That will help you update to iOS 18 smoothly without being stuck on Preparing Update.
Now, depending on the model of your smartphone, the buttons that need to be pressed may vary. Therefore, for your convenience, the methods of force restarting almost all types of iPhones are explained below.
For iPhone 8 or Later and iPhone SE (2nd Generation)
- Immediately press and release the Volume Up button.
- Immediately press and release the Volume Down button.
- Press and hold down the Sleep/Wake button.
- Wait until the Apple logo appears on the screen.
- Release the Sleep/Wake button.
- See if the issue is fixed.

For iPhone 7 Plus and iPhone 7
- Press and hold down both the Volume Down and Sleep/Wake buttons together.
- Wait until the Apple logo shows up.
- Release the buttons.
- See if the problem is resolved.

For iPhone 6s or Earlier and iPhone SE (1st Generation)
- Press and hold down both the Home and Sleep/Wake buttons together.
- Wait until the Apple logo displays on the screen.
- Release both buttons.
- Try installing the update again and see if the error is gone.

Solution 2: Connect to a Faster Wi-Fi Connection
To avoid additional charges, iPhones are configured to download and install iOS 18 and other software updates only when they are connected to a Wi-Fi network, and the battery is at least 50% charged. If the battery is less than the said percentage or the network is slow, your iPhone might be stuck on Preparing Update.
Therefore keep your iPhone connected to a charger and wait until it has 50% battery before you start to update your iPhone. As for the Wi-Fi network, you can follow the given steps to switch to a faster one:
- Go to Settings.
- Tap Wi-Fi.
- Tap the wireless network that you believe is faster than the current one.
- Enter the password for the network when iPhone prompts.
- Tap Join from the top-right corner.
- Try updating the iOS again.

Solution 3: Check Your Phone Storage
iPhone storage needs to keep software files and user data. If your phone has a lot of images, long videos, and other such files, you may run out of memory soon. When this happens, the newer iOS update may fail to download and get stuck on Preparing Update. The following steps explain how you can check the available space and free up some of it if your iPhone is stuck on Preparing Update screen:
- Go to Settings.
- Tap General.
- Tap iPhone Storage.
- Check the info available next to the iPhone label that says ‘<xxx> GB of <yyy> GB Used’.
Note: Here, <xxx> represents the amount of space that is being used, and <yyy> is the total space your iPhone has.
- Under the RECOMMENDATIONS section, tap Enable to allow iPhone to automatically offload the apps that are no longer in use.
- Alternatively, you can manually offload some unwanted apps by tapping each of them individually, tapping Offload App from the next screen, and tapping Offload App on the confirmation box that pops up from the bottom.
- Once you have enough amount of storage on your phone, you can try downloading and installing software update again.

Solution 4: Remove and Download the Software Update Again
As explained earlier, after the update file of iOS 18 is downloaded, iPhone extracts its files so they can be installed accordingly. If the update file you obtained is corrupt, you may see that your iPhone is stuck on Preparing Update. A good remedy for this is to delete the software update file and initiate the process from the start. The method to delete a downloaded update file is given below:
- Use the procedure explained in the previous solution to go to the iPhone Storage screen.
- Scroll down and locate and tap the software update file that iPhone downloaded.
- On the next screen, tap Delete Update.
- Tap Delete Update on the confirmation box that appears from the bottom.
- Wait while the downloaded update is removed from your iPhone.
- Try initializing the Software Update again.

Note: If you have downloaded a Beta version of an iOS, you must remove that instance of the update as well. Also, this method works only if the software update is downloaded but not installed. After your iPhone is updated, you must rely on a third-party tool to get rid of it. However, there’s no point in removing the update after successful installation.
Solution 5: Update iPhone Using iTunes
If none of the solutions explained above works, you can update your iPhone to iOS 18 through iTunes. When you take this path, iTunes downloads the software file of iOS 18 on your PC, and installs it on your iPhone from there seamlessly. All you need to do is to keep your phone connected to the computer until the process is complete. The method of doing this is explained below.
- Launch iTunes on your PC.
- Use the Lightning Cable to connect your iPhone to your computer.
- Wait while iTunes detects your iPhone.
Note: Usually, iTunes automatically prompts you if there’s a software update available for your iPhone. If it doesn’t, you can move to the next step.
- Click the Phone icon from the top-center of the interface.
- On the next window, make sure that Summary is selected from the Settings category in the left pane.
- Click Update or Check for Update from the upper-right section.
- Wait while iTunes checks for the available update and prompts you about it.
- From this point onwards, you can follow on-screen instructions to download the latest version of iOS and update your iPhone.

Solution 6: Restore iPhone from iTunes Backup and Update iOS During the Process
In this solution, you first back up your iPhone to iTunes, use iTunes to restore iOS, and then restore your iPhone from the iTunes backup.
What happens in the background is that when you restore iOS with iTunes, the application connects to the Apple server, checks for the latest iOS version available for your phone, and installs it. In this way, you can update to iOS 18 only if your device is compatible with this version.
However, because the entire operating system is installed from scratch, all your data and settings are wiped out, and you need to set up your device as new after the restoration is done. After this, you can restore your iPhone from the iTunes backup normally.
The method is explained below。
Note: Before going further, use the process explained in Solution 1 to force restart your iPhone but don’t initiate the software update process this time. Doing so will allow you to access your phone’s settings and configurations smoothly.
Back-Up iPhone with iTunes
- On your PC, launch iTunes.
- Use the procedure explained in the previous solution to connect your phone to the computer and get to its Summary screen.
- From the right window, click to select the This Computer radio button from the Automatically Back Up column of the Backups section at the lower part.
- Uncheck the Encrypt local backup box.
- From the Manually Back Up and Restore column, click Back Up Now.
- On the confirmation box that comes up next, click Don’t Encrypt.
- Wait while your iPhone is backed up to iTunes.

Restore iOS with iTunes
Note: Before starting with this procedure, you must disable Find My iPhone on your phone by going to Settings, tapping your name from the top, tapping Find My, tapping Find My iPhone on the next screen, and turning off the Find My iPhone switch from there. Once this is done, you can move to the step-by-step instructions that are given below:
- Use the method explained earlier to connect your iPhone to iTunes and get to its Summary screen.
- Click Restore iPhone from the upper section of the right window.
- Follow the on-screen instructions from there to allow iTunes to download and install the latest version of iOS available for your iPhone while erasing everything that it has and resetting all its settings to factory defaults.
- Once the process is complete and your iPhone restarts, set it up as a new device, and move to the final part.

Restore iPhone from iTunes Backup
- On your phone, turn off Find My iPhone as explained earlier.
- Use the method described previously to connect your iPhone to iTunes and get to its Summary screen.
- From the Manually Back Up and Restore column of the Backups section on the right window, click Restore Backup.
- On the Restore From Backup box, select the most recent version of the backup from the iPhone Name list.
- Click Restore.
- Wait while iTunes restores your iPhone from the backup.
- Start using your phone with the latest iOS normally.

Conclusion
If your iPhone is stuck on Preparing Update, the issue is not as big as it sounds. Usually, the ‘Preparing Update’ message stays on the screen for around 20 to 30 minutes depending on your iPhone model and the size of the software iOS 18. In case you notice that the process is taking a significantly long time, you can try any of the above solutions to resolve the problem.


